
ACF Group field type provides a way to structure and organize fields inside a field group. It provides a more accessible UI screen, which makes it easy for you to edit and organize data. Group Fields act like an organizational container that holds other subfields together.
Let’s take an example- I want to create custom fields for my Hero section items like – images, headings, buttons, etc. So, to make the organization process easier, I made one ACF Group Field called “Hero Section,” where all these required custom fields are clubbed together. So, if a lot of content needs updating within this hero section, it will be more manageable to edit within this single group.
Imagine if you have many custom fields assigned to a particular post; it can become difficult for you to organize them. So, to make things more manageable, we create groups containing fields that are to be displayed at the same location.
Key Takeaways
- ACF Group Fields are perfect for organizing related custom fields under one section.
- Easily create a group field and add multiple subfields like images, text, and buttons.
- Learn how to change the layout of group fields in the WordPress admin for better usability.
- Explore how to display the group field data on frontend using simple PHP code.
How to Create the ACF Group Field in WordPress
Now, let’s see how we can create an ACF Group field type. I am assuming that you have the Advanced Custom Field setup ready. So, let’s start the process.
Check our detailed article on the Complete Guide for ACF.
Step 1: Make a New Field Group
If you have not created a field group, then you have to create it first. A field group is a collection of all the custom fields. Therefore, all custom fields that we make together are called Field Group.
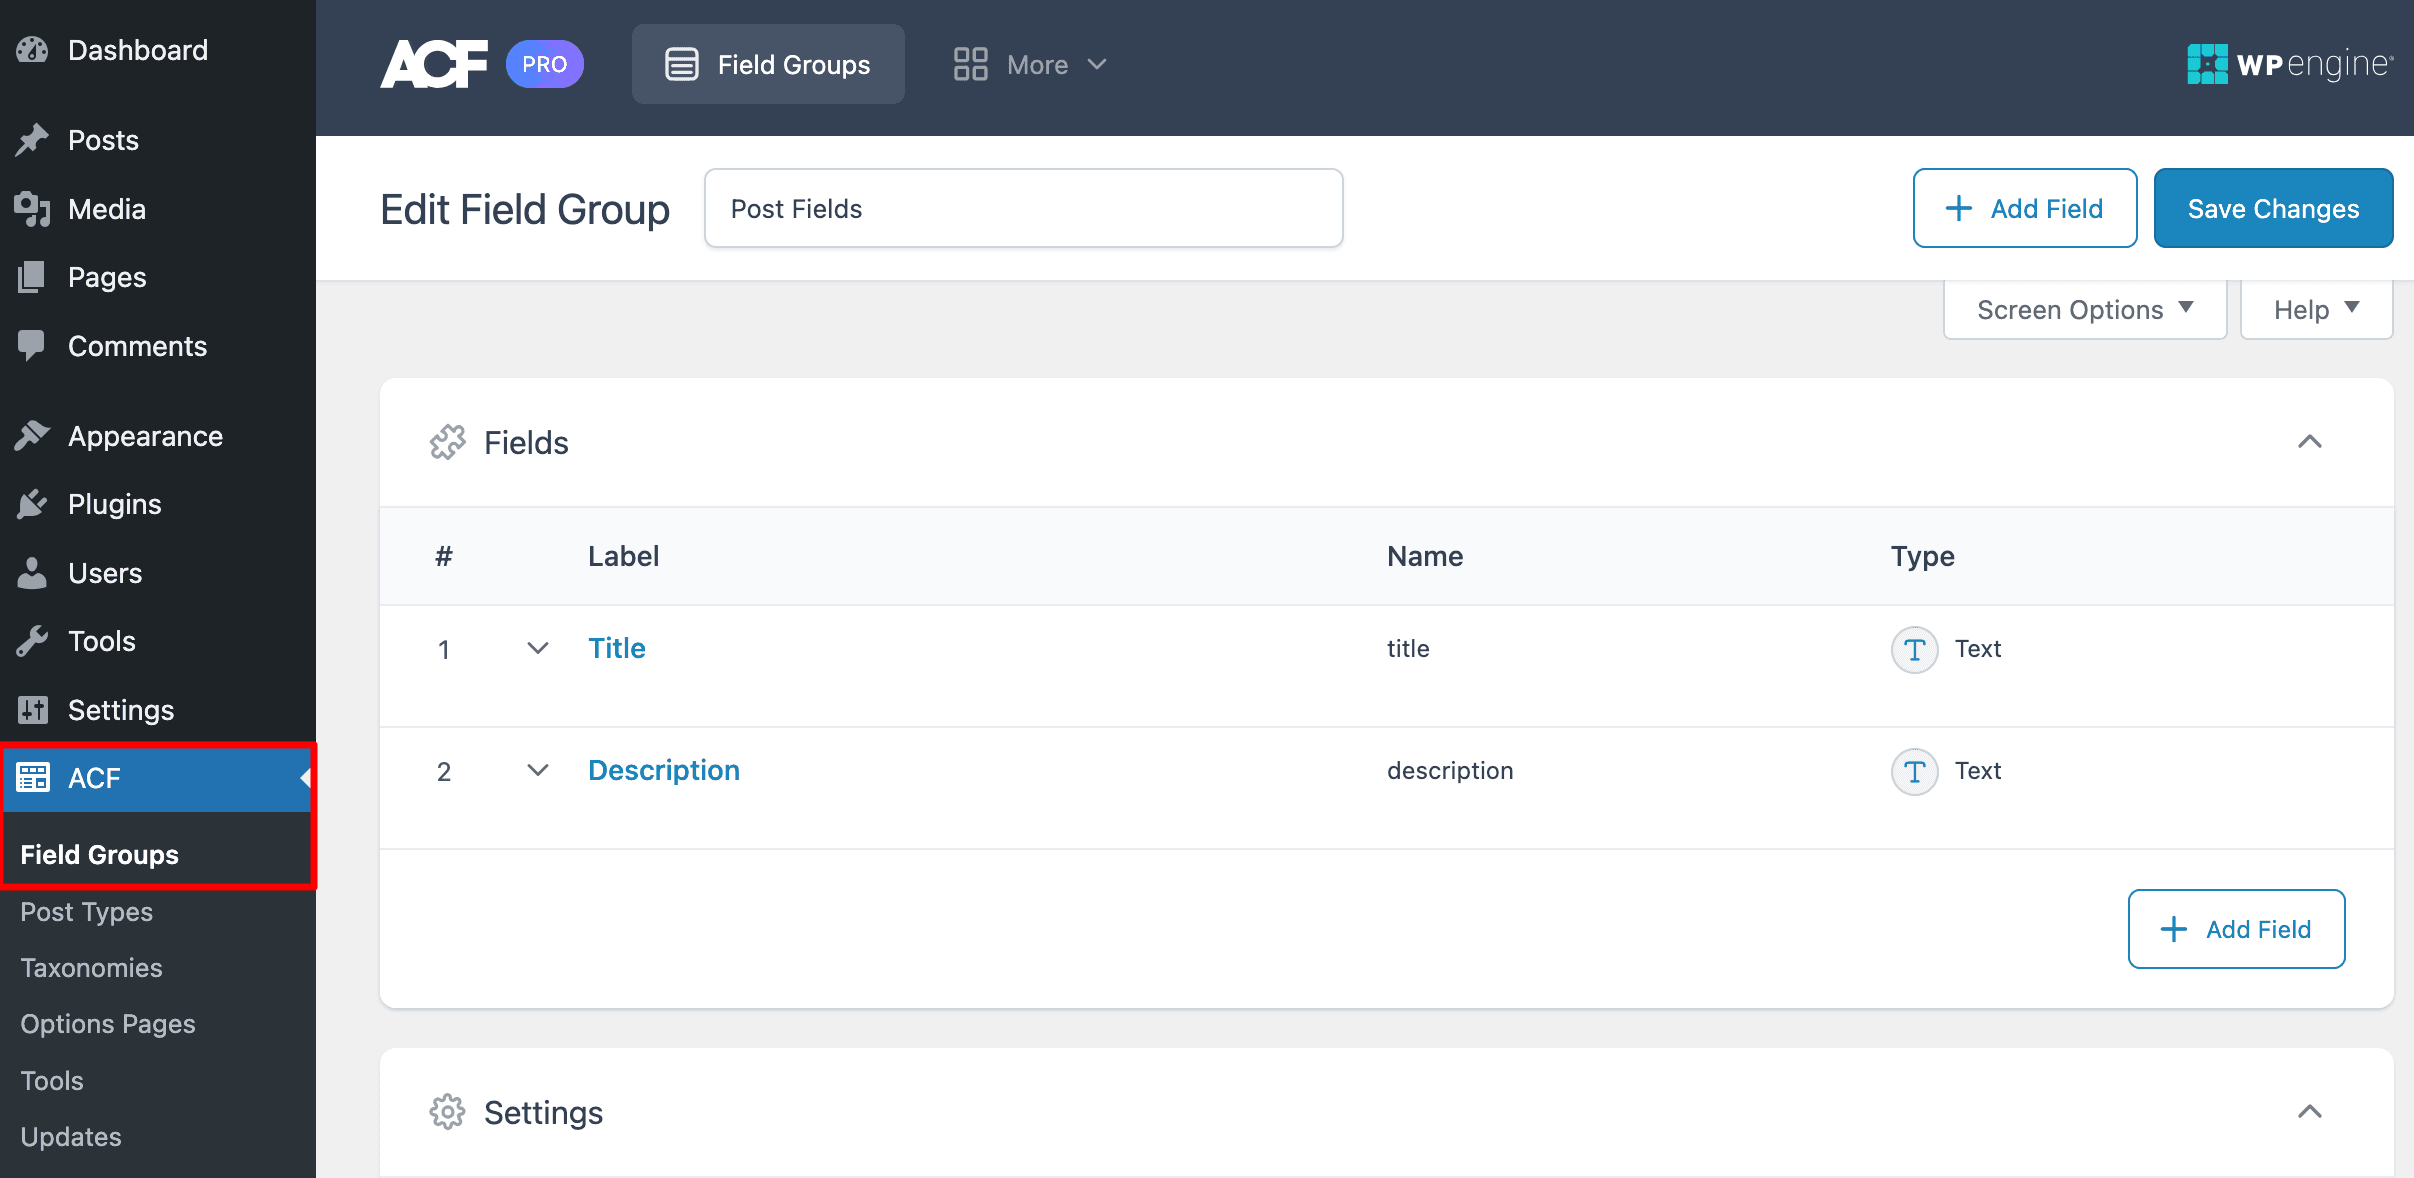
- To create a field group, go to your WordPress admin Dashboard.
- Then, click on ACF -> Field Groups -> Add Field.
For now, let’s give a name to our group of custom fields. In this example, I named it “Post Fields.”
Step 2: Create a Group Field
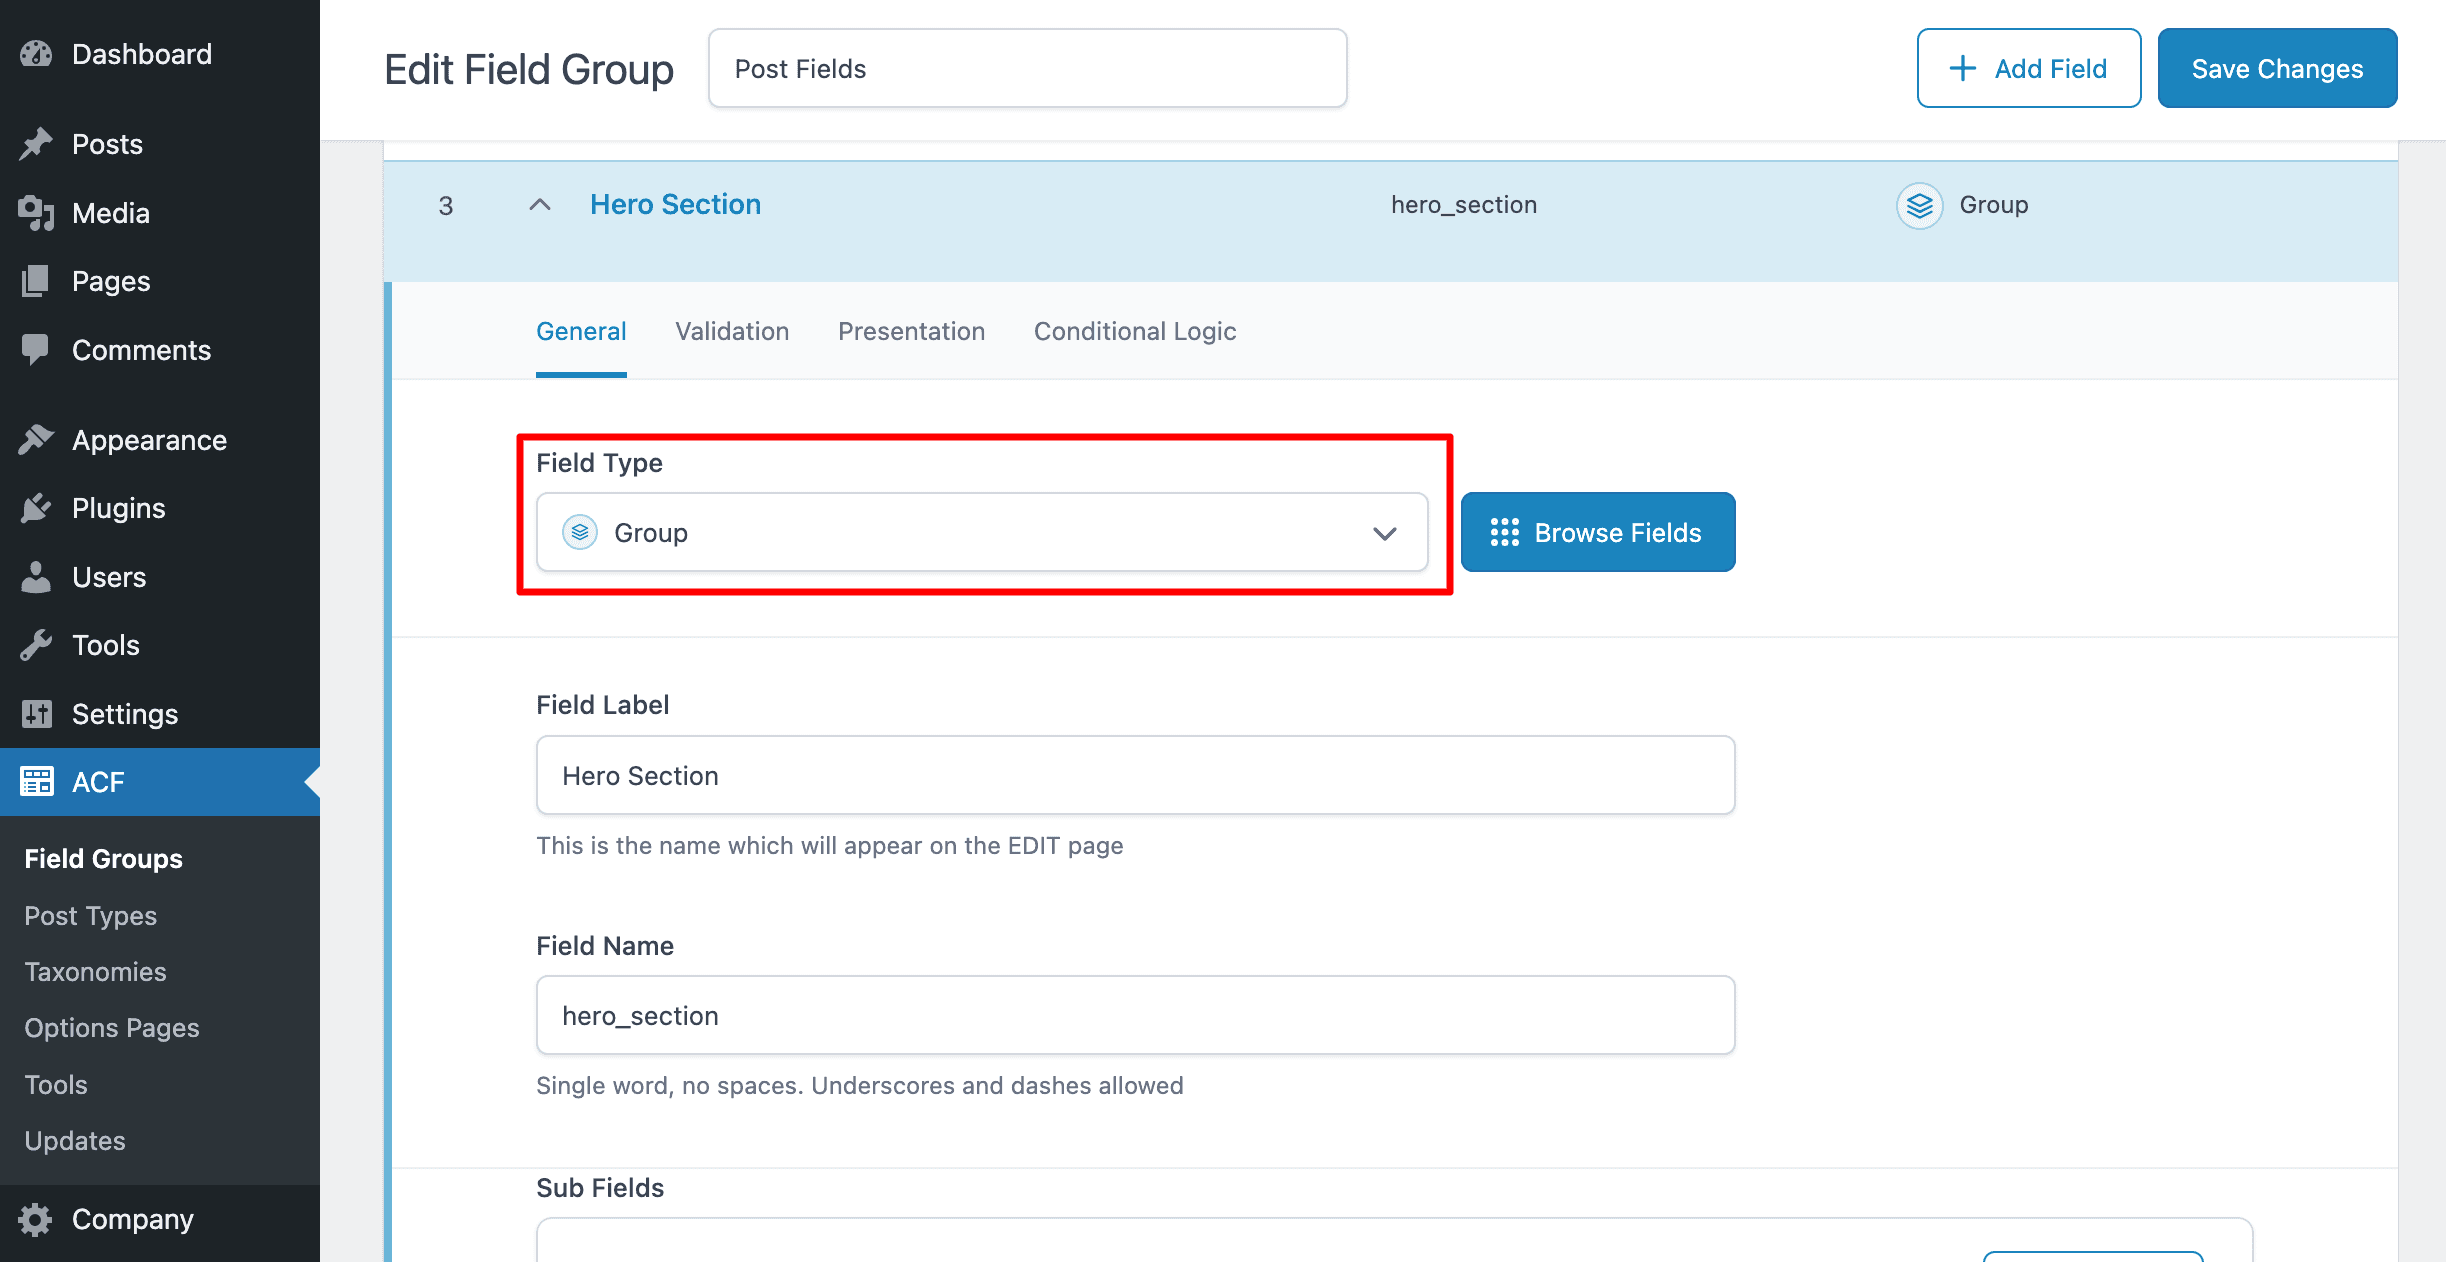
Now, we will create an ACF Group field that will hold other subfields and act as a group. For this, click on the Add Field button.
Here in this tutorial, I am creating a Group Field called Hero Section. Start by giving a field label, e.g., Hero Section, then the field name. After that, choose the Group option under the Field Type, as this field will act as a group for other custom fields.
Step 3: Add Sub-Fields Inside the Group
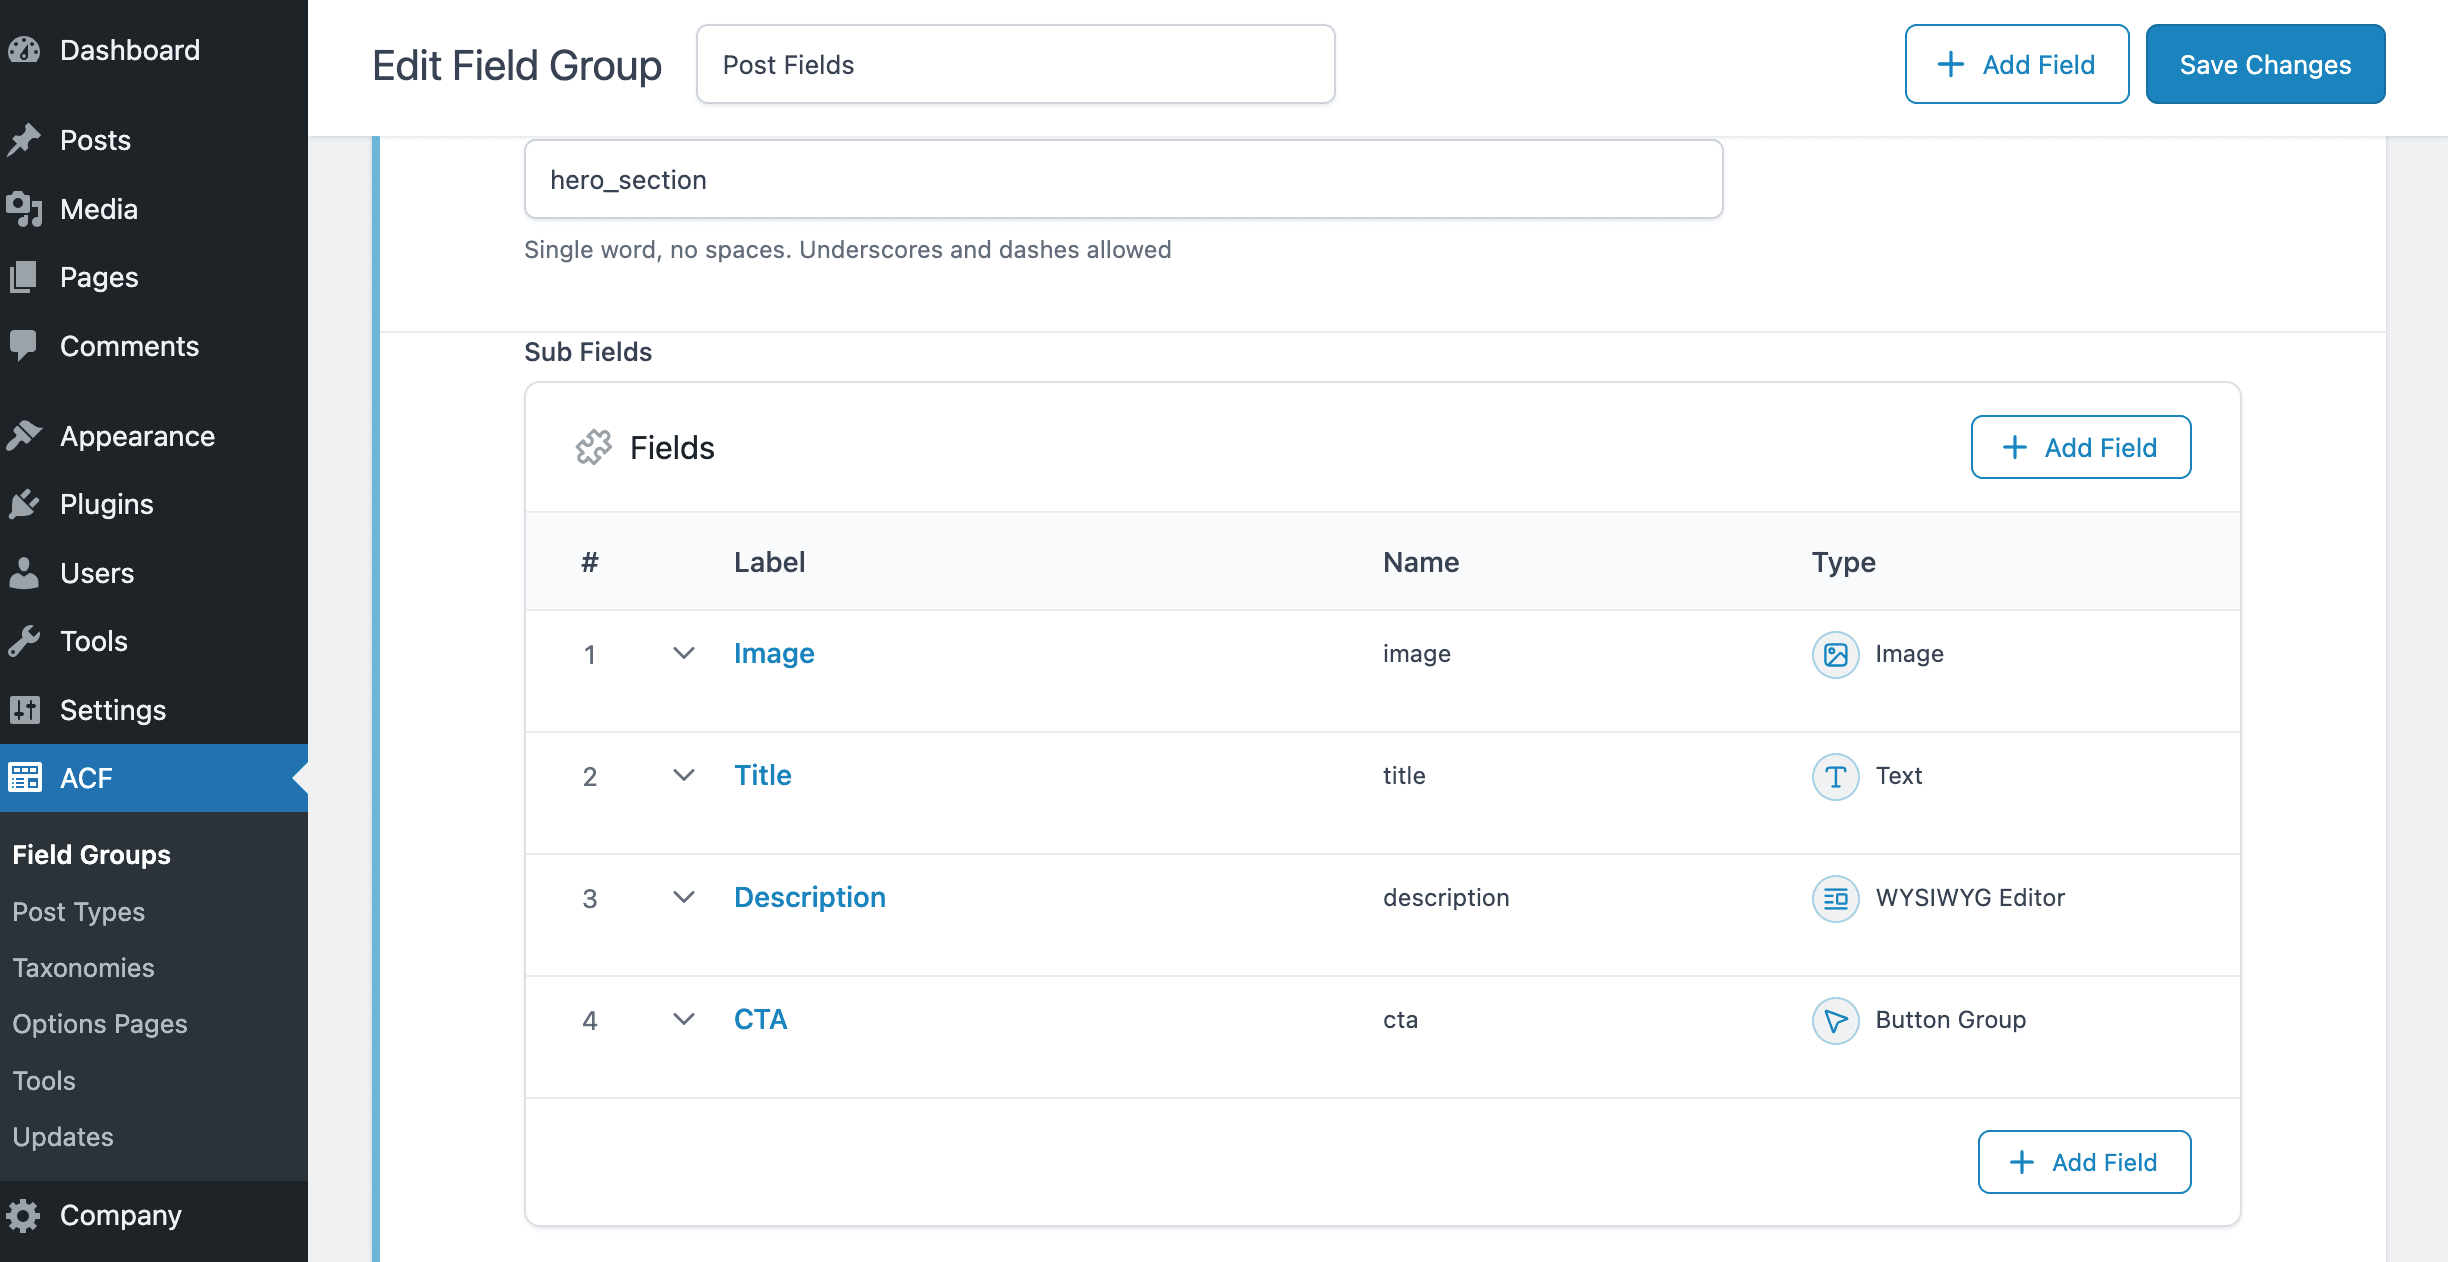
To create subfields inside the Group, click on the “Add Field” button and start adding fields.
Since I am creating an ACF Group for the hero section, I have added four subfields: Image, Title, Description, and a button. It’s totally up to you what fields you want to add.
Step 4: Configure the Layout Style
After setting up subfields, you can set the layout style to render the subfields in the admin area.
Head over to the Layout panel and select an appropriate layout style.

It will make it easy to populate the field data in a manner that suits you. For example, you can render the fields in Block, Table, and Row layouts. You can have a look below at how these layouts look on the admin screen.
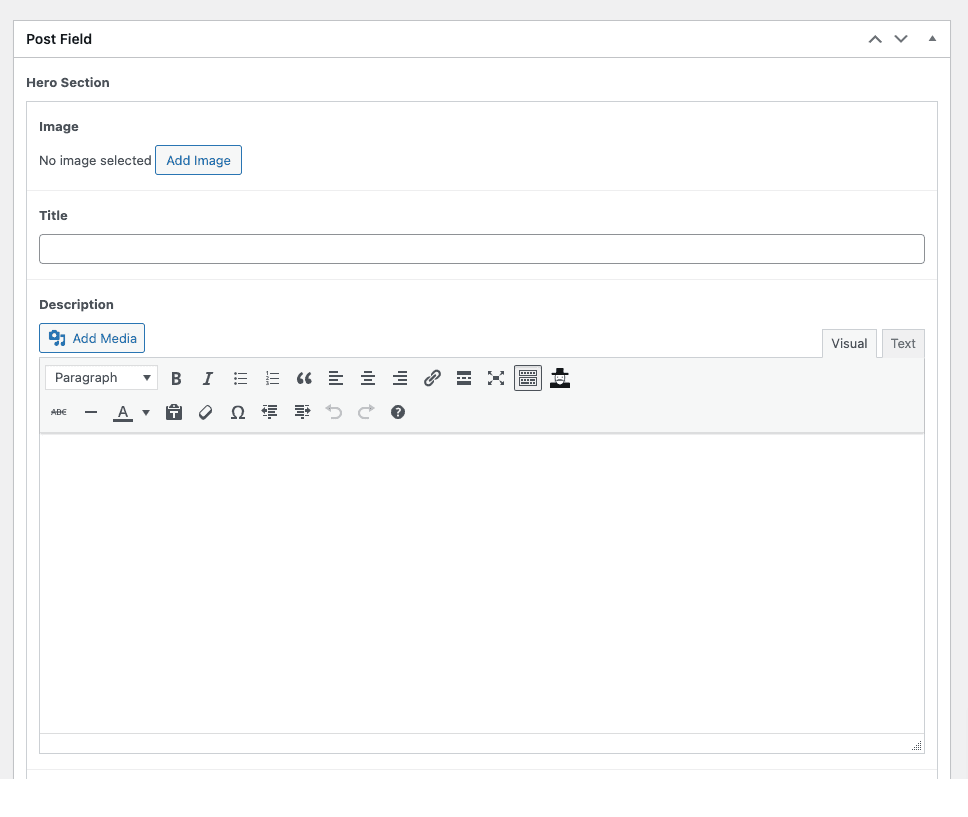
Block
In the block layout, subfields are displayed in a block one after the other.
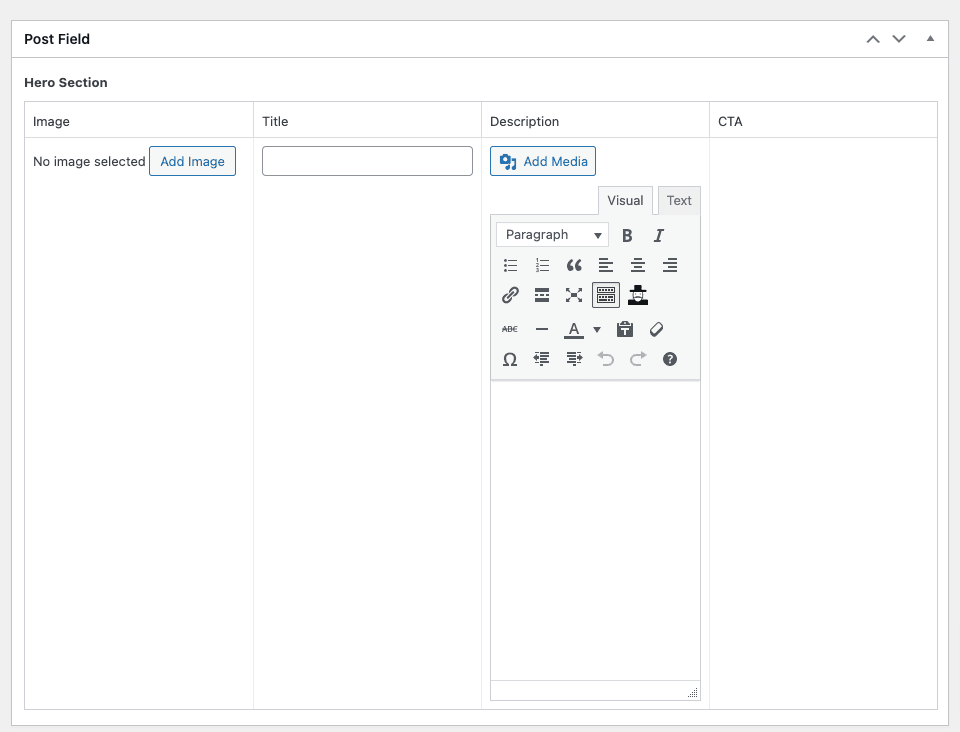
Table
In the table layout style, sub-fields are displayed on a single-row table. If a limited number of custom fields are available, then this layout will be best as all the fields will be displayed in one row.
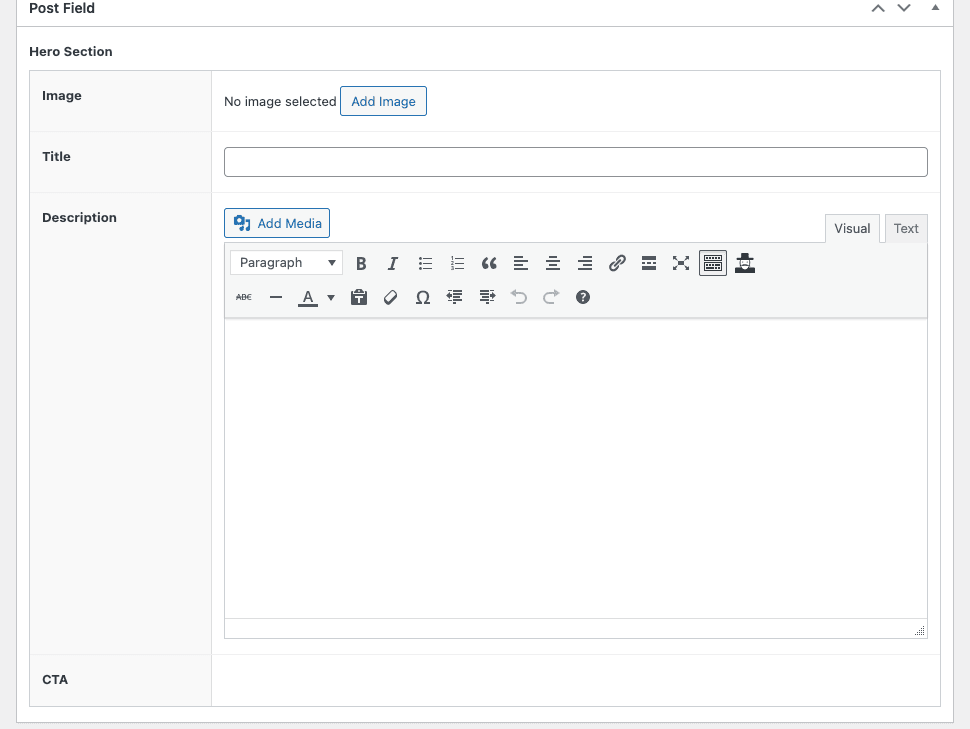
Row
Subfields are displayed in row format.
Step 5: Configure the Fields Location Rules
When it comes to configuring where and how fields show up, you have the choice of deciding what rules make sense for your website. Of course, if you have already assigned the field locations, then you can skip this process.
Go to the Settings -> Location Rules.
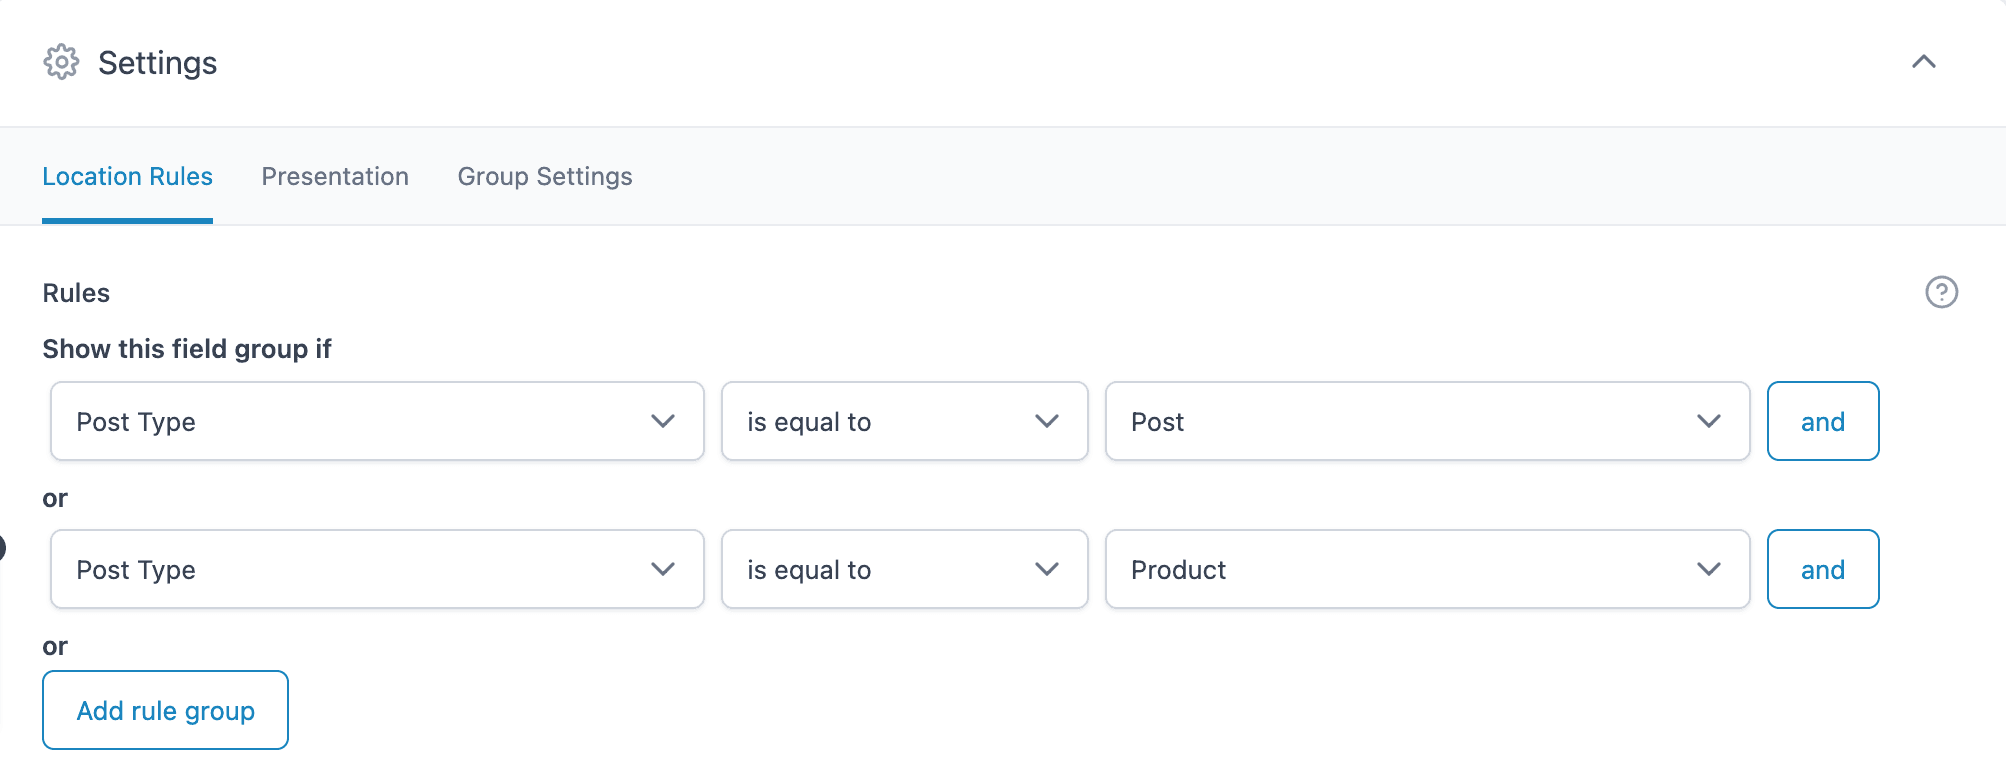
For example, if a post type equals “post,” then showing that group fields makes perfect sense, as it means for every post. If you create this for a specific post type, you can associate the custom field group with that custom post type.
Once you are done, hit the Save Changes button and make your ACF Group Field live.
How to Display ACF Group Field Data on the Frontend
The Group field returns an array containing each subfield’s value in a name => value format.
Display Contents
This example demonstrates how to display the contents of a Group field.
<?php
$hero = get_field('hero');
if( $hero ): ?>
    <div id="hero">
        <img src="<?php echo esc_url( $hero['image']['url'] ); ?>" alt="<?php echo esc_attr( $hero['image']['alt'] ); ?>" />
        <div class="content">
            <?php echo $hero['caption']; ?>
            <a href="<?php echo esc_url( $hero['link']['url'] ); ?>"><?php echo esc_html( $hero['link']['title'] ); ?></a>
        </div>
    </div>
    <style type="text/css">
        #hero {
            background-color: <?php echo esc_attr( $hero['color'] ); ?>;
        }
    </style>
<?php endif; ?>
Loop Example
This example demonstrates how to display the same group using the have_rows() function.
<?php if( have_rows('hero') ): ?>
    <?php while( have_rows('hero') ): the_row();

        // Get sub field values.
        $image = get_sub_field('image');
        $link = get_sub_field('link');

        ?>
        <div id="hero">
            <img src="<?php echo esc_url( $image['url'] ); ?>" alt="<?php echo esc_attr( $image['alt'] ); ?>" />
            <div class="content">
                <?php the_sub_field('caption'); ?>
                <a href="<?php echo esc_url( $link['url'] ); ?>"><?php echo esc_attr( $link['title'] ); ?></a>
            </div>
        </div>
        <style type="text/css">
            #hero {
                background-color: <?php the_sub_field('color'); ?>;
            }
        </style>
    <?php endwhile; ?>
<?php endif; ?>
Final Thoughts: Why You Should Use ACF Group Fields
In conclusion, creating and using ACF Group Fields can make your life easier when working with lots of custom fields in WordPress. It helps organize and manage related fields together. In this guide, we covered how to create a group field step by step, add subfields to it, and control where it appears. Plus, we showed you how to display the grouped content on your website.
FAQs About ACF Group Fields in WordPress
What is an ACF Group Field in WordPress?
An ACF Group Field acts like a container that holds multiple custom fields together, helping to organize them under one section in the WordPress admin area.
How do I create a Group Field in ACF?
You can create a field group in ACF, then add a new field of type “Group.” Inside that group, you can add any number of subfields.
Can I add multiple types of fields inside a Group Field?
Yes, you can add different field types like text, image, button, color picker, etc., as subfields inside a Group Field.
Can I customize how Group Fields appear in the admin panel?
Yes, ACF allows you to choose layout styles like Block, Table, or Row for better visual organization of your subfields.
Do Group Fields work with custom post types?
Yes, you can assign your ACF Group Fields to custom post types by setting location rules when creating the field group.


