
ACF Repeaters are a great way to organize multiple instances of the same data. They can be a powerful field type when the subfields repeat often. In addition, it offers flexibility and versatility, as any field type is possible within a repeater, and there is no limit to the number of repeats either.
Imagine you have something you want to repeat, like client testimonials on your website. You have fields for the client’s name, their feedback, and maybe a star rating. Now, if you want to show testimonials from multiple clients, instead of copying and pasting those fields over and over, you use a Repeater Field.
You can use any type of field you want inside them. It’s like having a toolkit with different field types for different jobs.
In this tutorial, we’re going to take a close look at the ACF Repeater field. We’ll discuss how to make them and how to use them. So, get ready for a step-by-step guide on mastering the ACF Repeater field.
Key Takeaways
- What ACF Repeater Field is and how it works
- How to set up repeater fields and subfields in ACF
- Displaying repeater data using simple PHP loops
- Admin layout and field configuration options
Setting Up ACF Repeater Field Type
With the ACF Pro Setup ready, head over to your WordPress admin dashboard to create a field group; you can skip the first step if you have already created the field group.
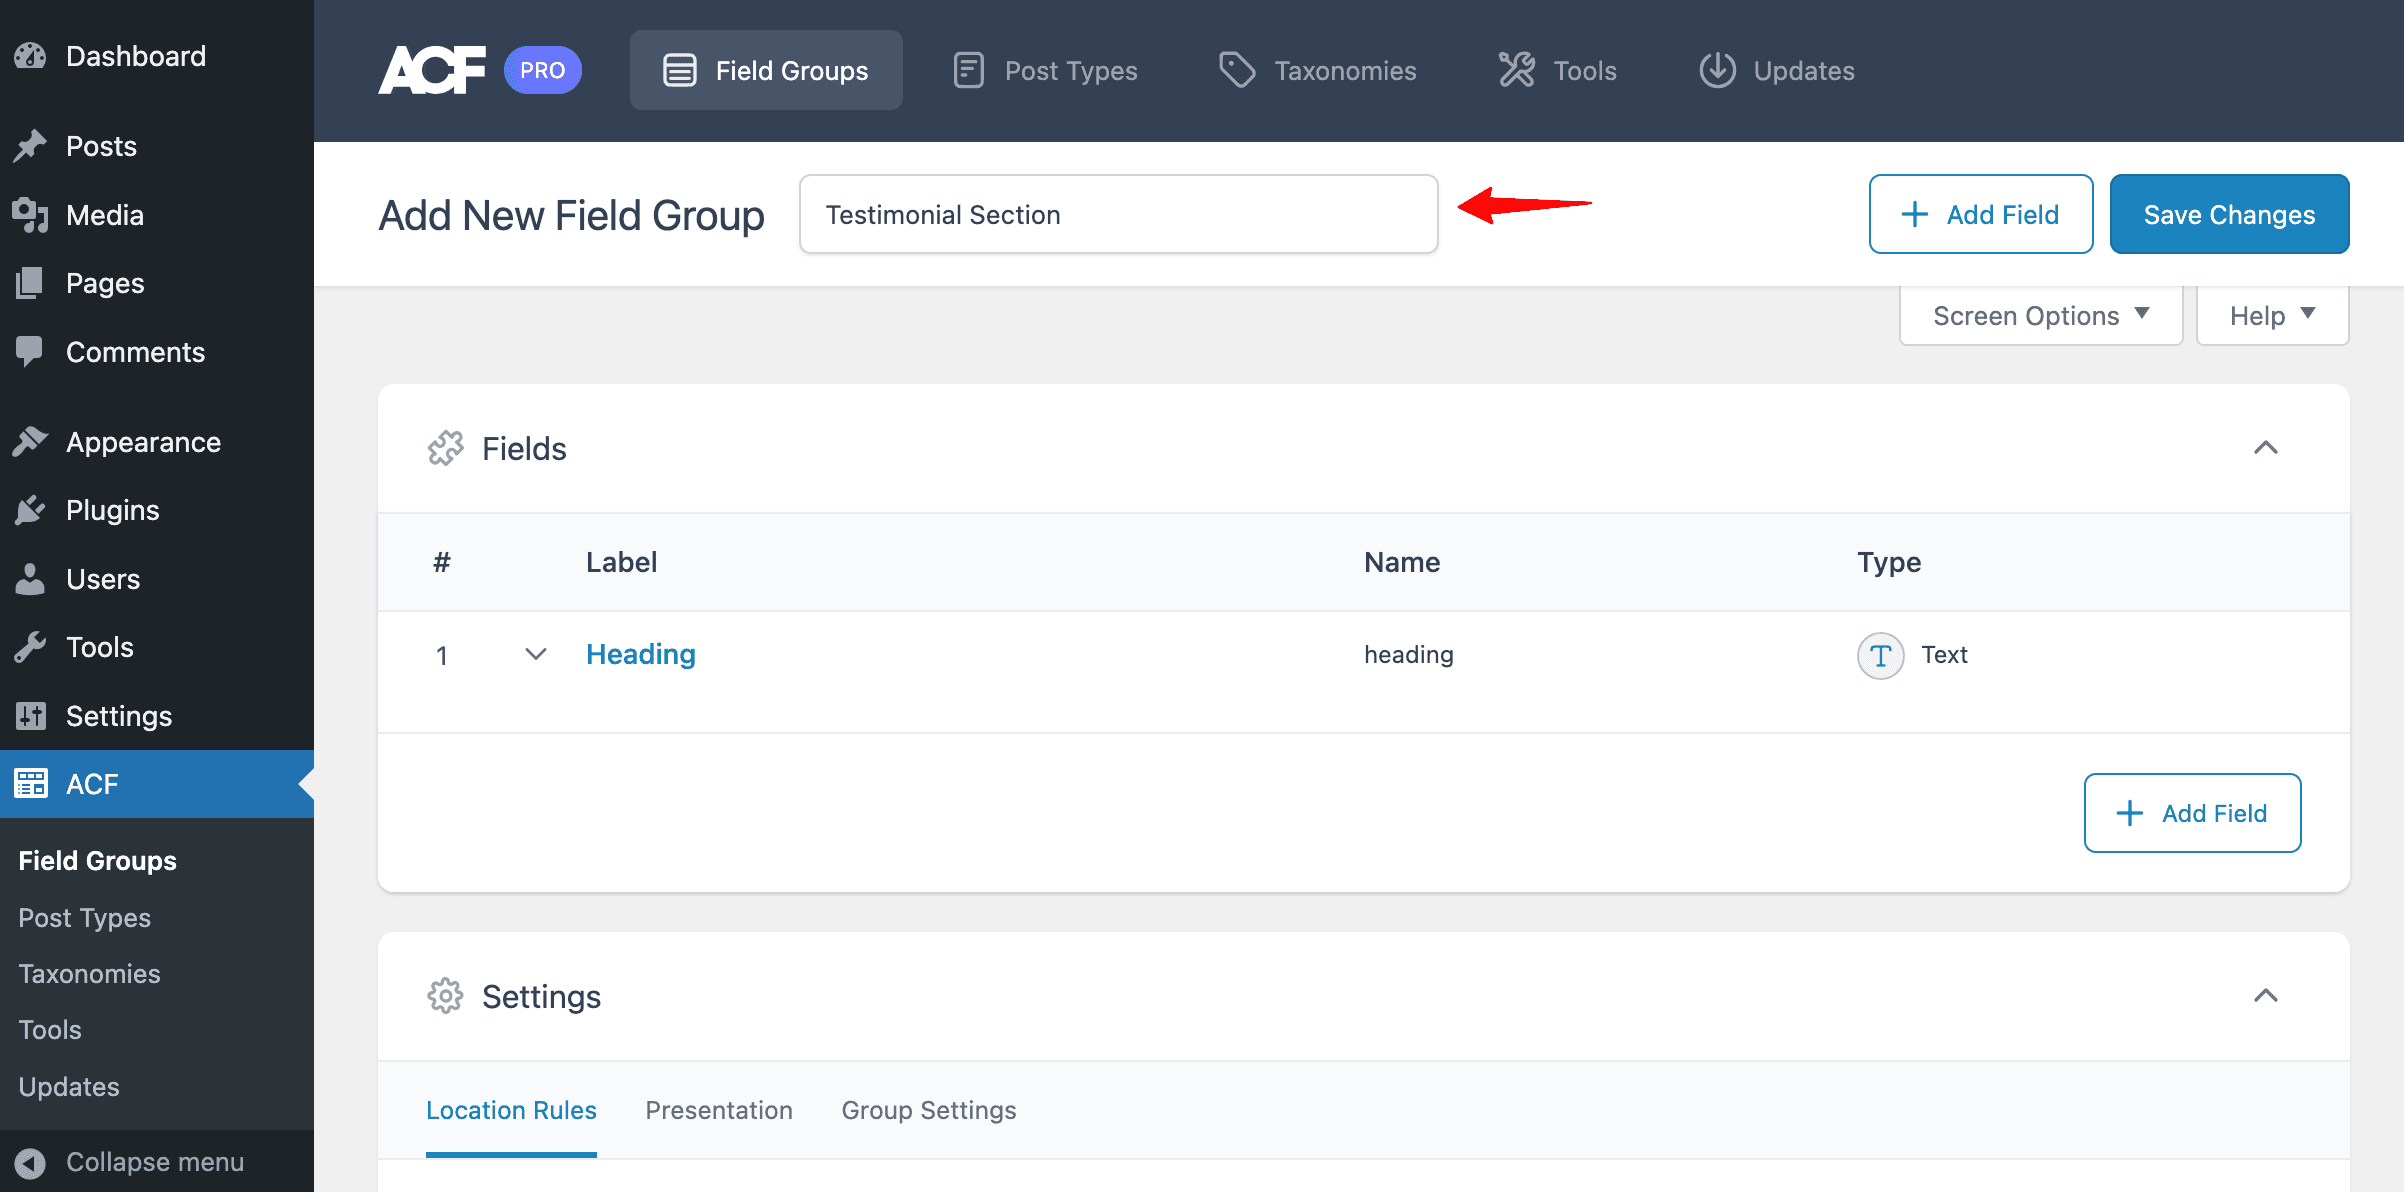
Step 1: Create a new Field Group
To add a field group, go to ACF -> Field Groups -> Add Field. Give a suitable title to the field group.
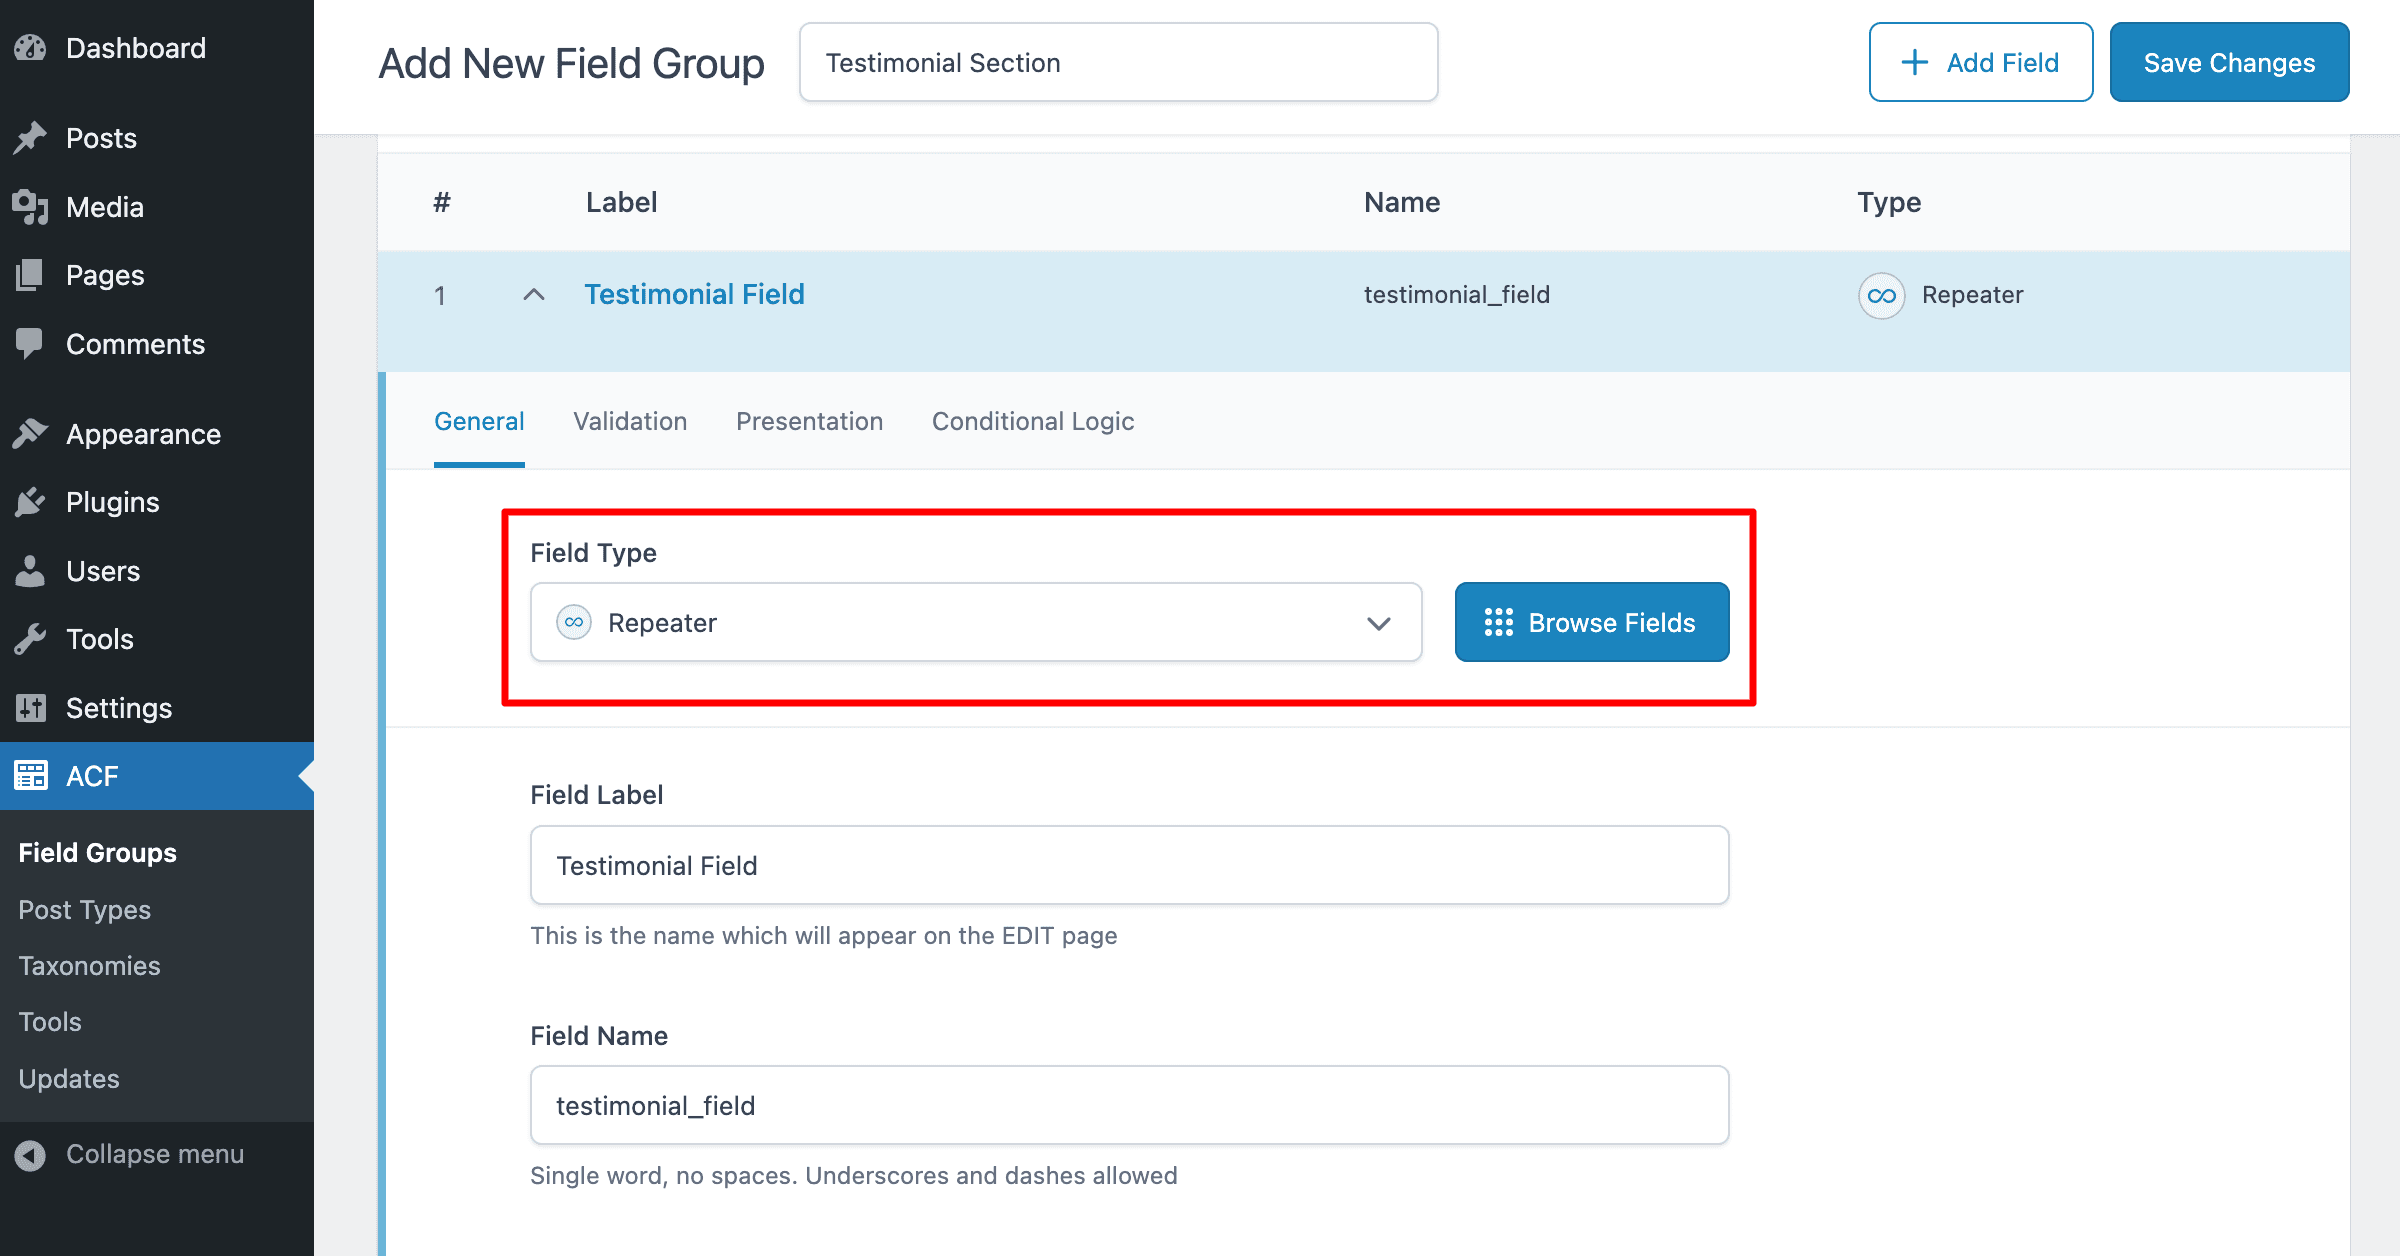
Step 2: Creating a Repeater Field
Now, you need to create an ACF Repeater field that will hold other repeating subfields. For this, click on the Add Field button.
Checkout: How To Create Team Member Section using ACF Repeater Field?
Step 3: Adding Repeater Sub Fields
To create subfields inside the Repeater field, click on the Add Field button and start adding fields.
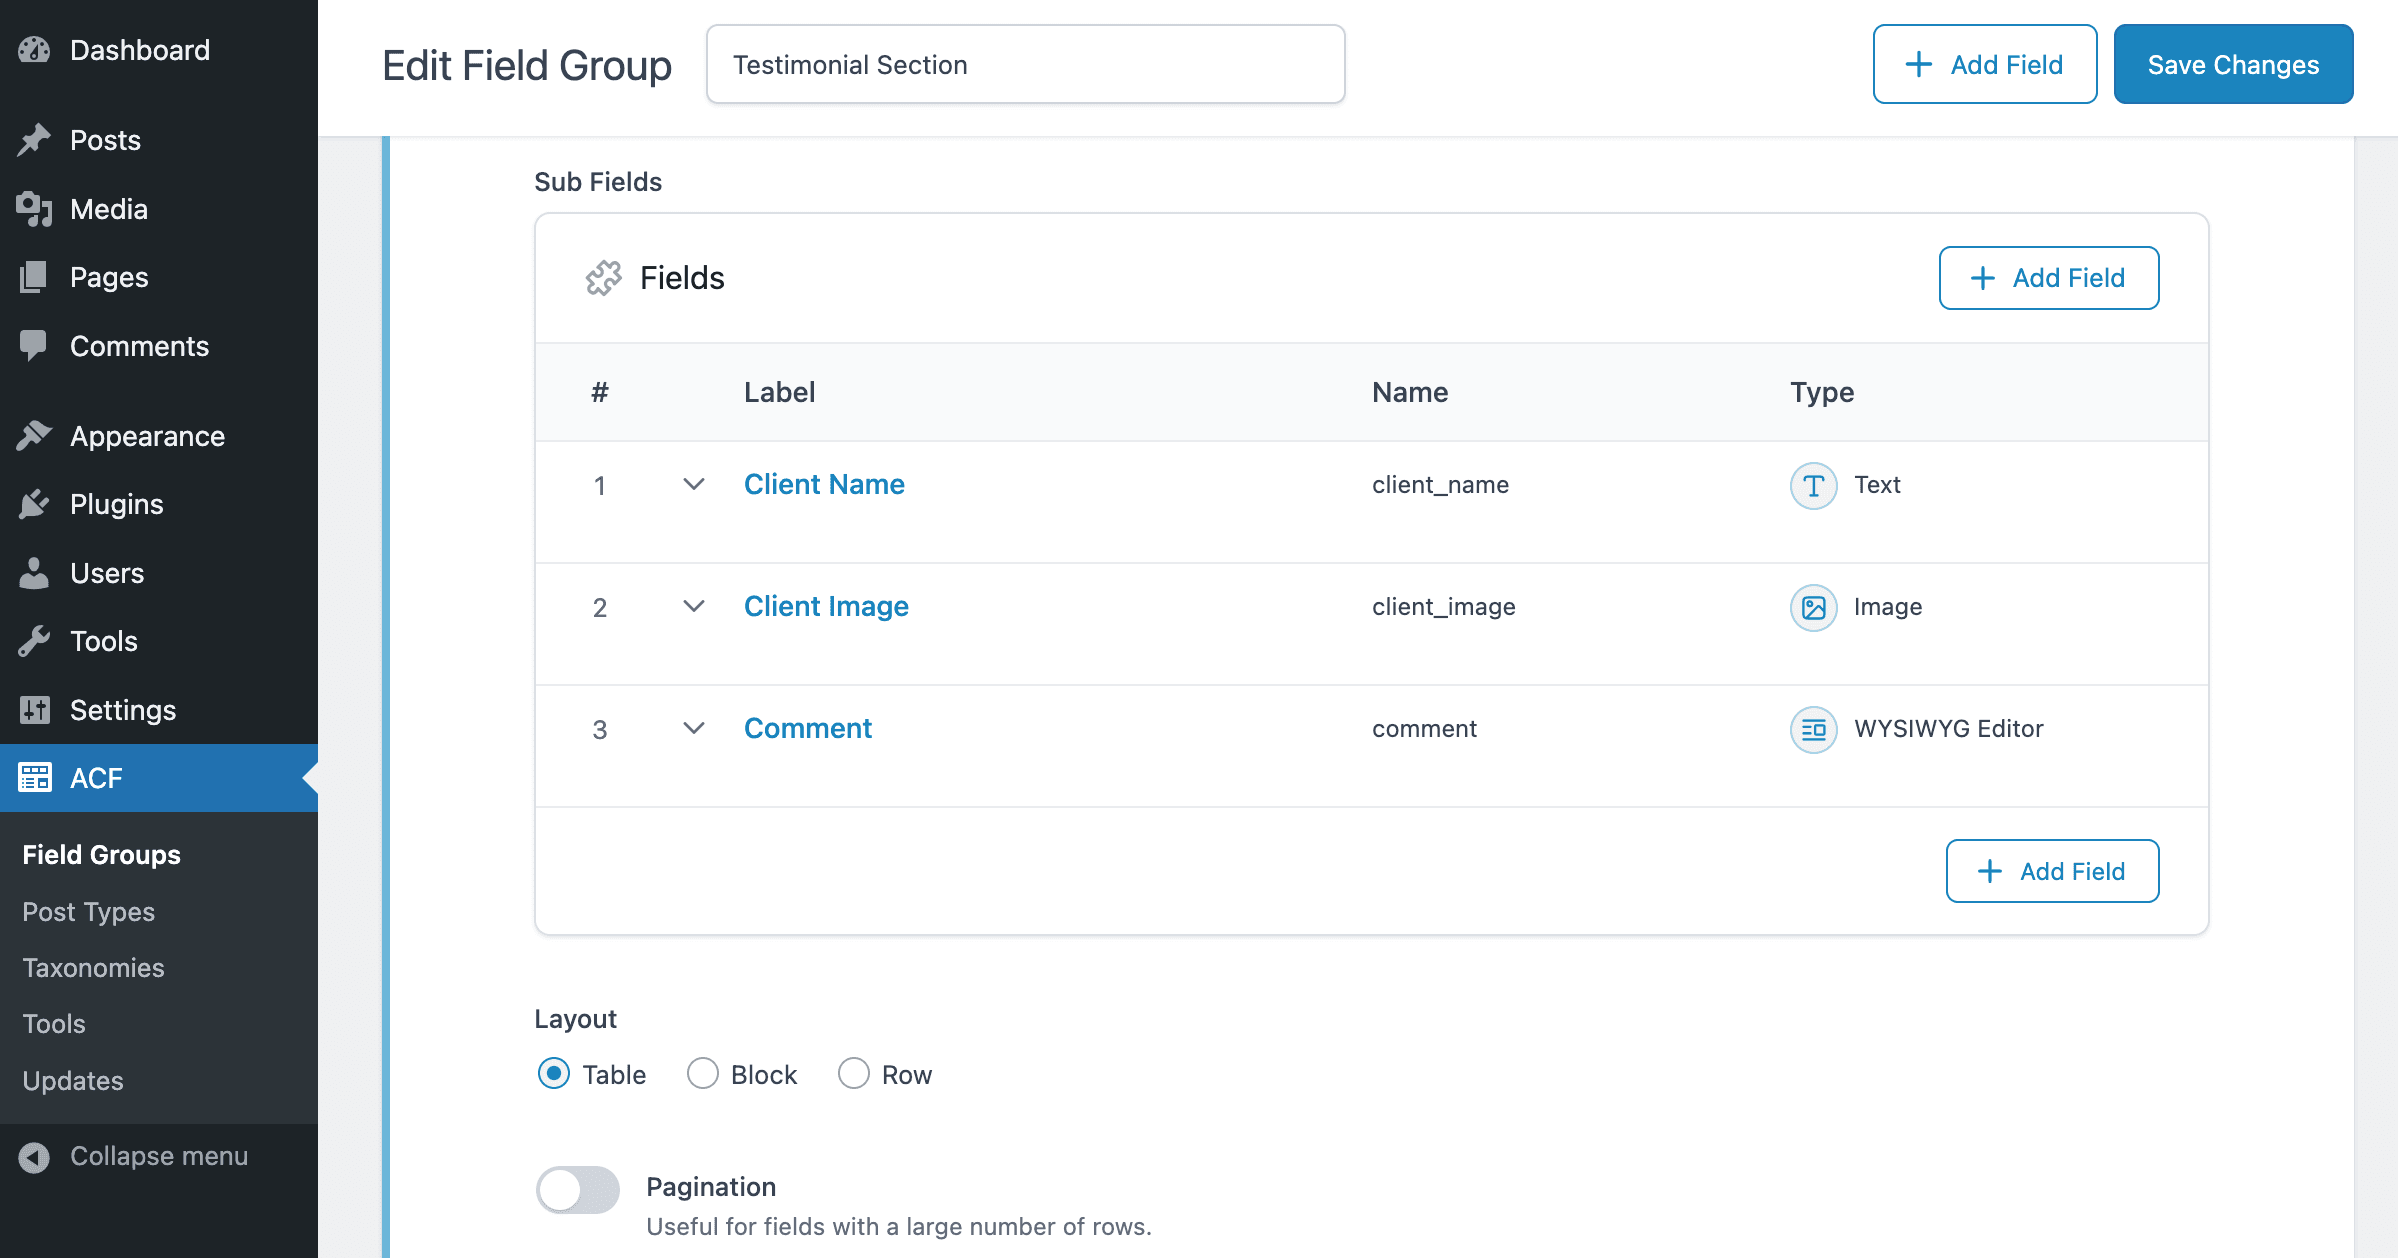
Since we are creating Testimonial sections, I have added the fields needed to create a Testimonial layout, like Client Name, Image, and Description.
Step 4: Configuring the Other Settings
Once the subfields have been added to the repeater field, you can configure a few additional settings related to how it appears when viewed in the Admin area.
General
You have control over how information is arranged in the admin area and can decide how many rows of data appear on each page. There are three layout choices to pick from.

Table
Subfields are displayed in a table format. Labels will appear in the table header.

Block
Subfields are displayed in blocks, one after the other.

Row
Subfields are displayed on a two-column table. Where Labels appear in the first column.

Validation
- Minimum Rows: Sets a limit on how many rows of data are required.
- Maximum Rows: Sets a limit on how many rows of data are allowed.

Presentation
- Instructions: Write an instruction for the author that will be shown when the author submits data.
- Collapsed: Select a subfield to be displayed when each field row is collapsed.
- Button Label: The text is shown in the ‘Add Row’ button at the front end.

Step 5: Configure the Location
When setting up where and how fields show up, you have the choice to decide what rules make sense for your website. Of course, if you’ve already set the field locations, then you can skip this process.
Go to the Location Settings.

For example, for my testimonial section, I have assigned the repeater fields to a Page. If you create repeaters for a specific post type, you can associate the custom field group with that custom post type.
Once you are done, hit the publish button and make your ACF Repeater Field live.
Template Usage
The ACF Repeater field will return an array of rows, where each row is an array containing sub-field values.
For the best developer experience, ACF has created some extra functions specifically for looping over rows and accessing sub-field values. These are the have_rows, the_row, get_sub_field, and the_sub_field functions.
Basic loop
This example demonstrates how to loop through a Repeater field and load a subfield value.
<?php

// Check rows exists.
if( have_rows('testimonial_section') ):

    // Loop through rows.
    while( have_rows('testimonial_section') ) : the_row();

        // Load sub field value.
        $name = get_sub_field('client_name');
        $image = get_sub_field('client_image');
        $text = get_sub_field('comment');
        // Do something...

    // End loop.
    endwhile;

// No value.
else :
    // Do something...
endif;
FAQs on ACF Repeater Field
What is a Repeater Field in ACF?
A repeater field in ACF allows you to group and repeat sets of subfields within posts, pages, or custom post types. It’s useful for repeated data like testimonials, FAQs, or team sections.
Do I need ACF Pro to use repeater fields?
Yes, the Repeater Field is available only in the Pro version of Advanced Custom Fields.
Can I use ACF repeater fields with Elementor?
Yes. If you use plugins like Anywhere Elementor Pro, you can display repeater field data without writing code.
Are there limits to how many repeater rows I can add?
No, ACF does not limit the number of rows you can add inside a repeater field.
Conclusion
In conclusion, ACF Repeaters are a fantastic tool for keeping your data organized, especially when dealing with repeated information. Their power shines through when you have subfields that need to be repeated frequently. The flexibility they offer is incredible; you can use any field type within a repeater, and there’s no limit to how many times you can repeat.
Try using it with Anywhere Elementor Pro to display repeater fields without writing code!
Checkout: How To Create a FAQ Section using ACF Repeater Field?


