
Progress Bar is an interactive graphical element that is widely used to represent process progression and skillsets.
A Progress Bar widget provided by Elementor Addon Elements allows you to create fully functional and interactive bars for your WordPress website. Moreover, there are versatile customization options available to style the bar.
In this tutorial, you’ll learn how to create and customize a Progress Bar using the Progress Bar widget—all without writing a single line of code.
Key Takeaways: What You’ll Learn
- How to add an animated progress bar using Elementor and EAE plugin
- Customization options available: layout, percentage, and visibility
- How to style titles, progress lines, and percentage labels
- Use cases for progress bars in portfolios, stats, service pages, and more
Why Use a Progress Bar on Your Website?
- Showcase Skillsets: Perfect for portfolios (e.g., HTML – 90%, CSS – 80%).
- Project Completion: Visual representation of a project’s status or phase.
- Data Visualization: Makes abstract numbers more engaging and understandable.
- User Engagement: Adds movement and interactivity to static pages.
- Responsive Design: Progress bars adapt easily to various screen sizes.
Steps to Create a Progress Bar in Elementor
Step 1: Install & Activate Plugin
In order to create a Progress Bar in Elementor, you need to first install and activate the Elementor Addon Elements Plugin.
Step 2: Add Progress Bar widget
To create a progress bar in Elementor, first, create a page or a template and edit with Elementor. Then drag and drop the Progress Bar widget in Elementor editor.

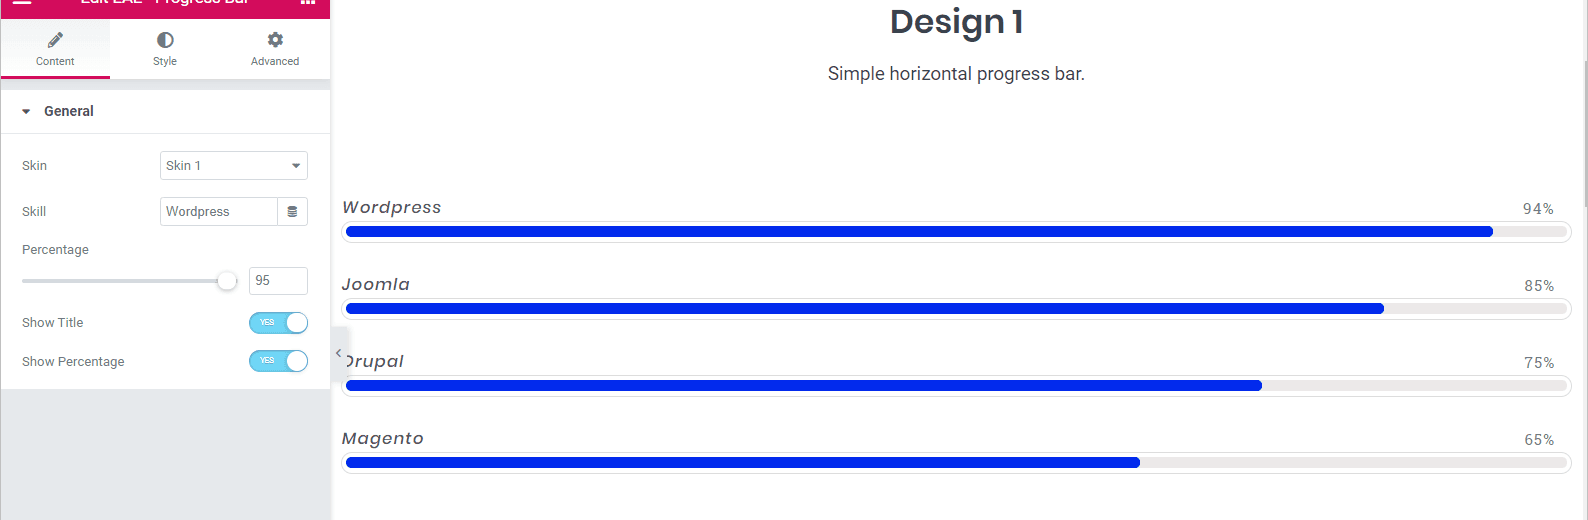
Step 3: Content Tab Customization
General Section: Here, in this section, you can set the layout of the bar, there are many custom skins options present to choose from. Then give a name and set the percentage of the skill that you want to showcase. You can also toggle the visibility of the title and the percentage.
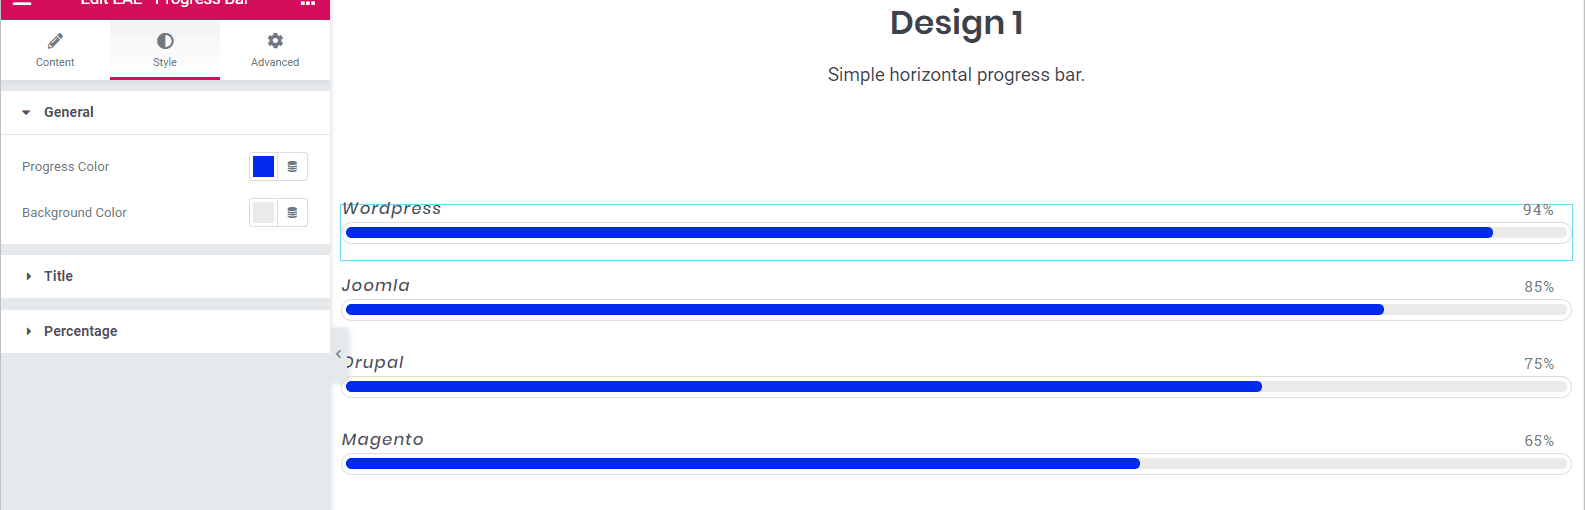
Step 4: Style Tab Customization
After setting up the layout of the progress bar, now you can also style it as you wish. Under the Style tab, you will get options to style the progress bar.
You can also customize the General, Title, and Percentage section. By setting the color and typography of each section.
FAQs on Progress Bar in Elementor
Do I need Elementor Pro to create a progress bar?
No. You only need the free version of Elementor along with the Elementor Addon Elements plugin.
Can I use different colors for each bar?
Yes, the Progress Bar widget allows you to set custom colors for each individual progress bar.
Where should I use progress bars on my website?
Progress bars are ideal for portfolio pages, skill sections, project timelines, statistics, service comparisons, or even onboarding steps.
How many progress bars can I add to a page?
There’s no fixed limit. You can add multiple progress bars as needed. Just make sure the layout remains clean and user-friendly.
Final Thoughts
With just a few simple steps, you can add attractive, responsive progress bars to your WordPress site using Elementor and EAE. Whether you’re showcasing skills, stats, or project milestones, this widget helps present data in a way that’s both visual and impactful.
Ready to give your website a modern edge? Try it out now and check the live Progress bar demo!


