
Want to display your blog posts in a visually appealing, chronological layout?
A post timeline is a creative way to showcase your content and keep visitors engaged. Whether you run a blog, portfolio, or event-based site, Elementor’s Timeline widget from EAE lets you create stunning post timelines—without writing a single line of code.
In this tutorial, you’ll learn how to create an attractive blog post timeline using the Timeline widget from Elementor Addon Elements, all without writing a single line of code.
Key Takeaways
- Learn how you can display blog posts in an interactive, scrollable timeline.
- The Timeline widget offers flexible layout, query, and styling options.
- Easily control what content to show—images, titles, excerpts, or read more buttons.
- Timelines improve visual engagement and help guide readers through your content.
What Is a Post Timeline?
A post timeline is a layout style that organizes blog posts or content chronologically, typically with visual elements like cards, icons, and connecting lines. It helps break your content into digestible sections, making it easier for visitors to scan, understand, and interact with.
Timelines are especially useful for:
- Displaying blog archives
- Highlighting company milestones
- Showcasing project stages or product updates
- Structuring event-based content (e.g., conferences or campaigns)
Pre-Configuration Requirements
First, to create a post timeline, you need to install and activate the following plugins:
Steps to Add Timeline Widget in Elementor
Step 1: Add Timeline widget in Elementor
To begin with, first, create a page or a template where you want to add the Timeline widget and edit the page with Elementor. Then just drag and drop the Timeline widget in Elementor. You will see a timeline appear with default settings.

Step 2: Configuring Timeline
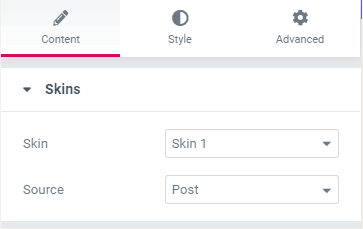
Skin
Under the Skin, the option selects the layout for the timeline. Then select Post in the Source field option since we will be displaying our blog posts in the timeline layout.
Query
Here you can select one or more categories and tags for your post, or can even choose to display all posts (here I have selected the tutorial category). Also, you can include or exclude the posts which you do not want to showcase in the timeline. Edit the post count option to control the number of posts to be displayed.
You can also opt to display the most recent post at the top of the timeline card. The Order By option allows you to sort the blog post based on the title, menu order, date, etc.

Post Element
In the Post Element option, we can configure the elements that we want to display in the Timeline Card. The cards that we see along the timeline have 5 basic elements Title, Date, Feature Image, Excerpt, and a Button. We can manage the visibility of the elements that we want to display inside the cards. The element will fetch the excerpt from your website automatically. However, you can also manually set the limit to the number of words you want to display in the Excerpt field.

Global Icon
To set a default icon across all your timeline card, you can select a global icon from the Font Awesome library or insert an image as an icon for the cards
Learn how to add Custom Icons in Elementor?

Step 3: Styling Post Timeline
After you are done setting up the structure of the timeline, next you need to style it. Here you will get all the styling features to create an attractive timeline for your blog post. To make the Post Timeline responsive across all devices, like Mobile and Tablet, you can set the responsive parameters.
We can style each element of the timeline individually, like the card, date, connector, Call To Action button, and icon.

Final Result: Your Beautiful Blog Timeline
There is the final outcome of the post timeline, showing the various blog posts in a very attractive and engaging manner.

FAQs on Timeline in Elementor
Can I display posts from specific categories in the timeline?
Yes. The Timeline widget allows you to filter and display posts based on selected categories, tags, or custom queries.
Is the timeline layout responsive for mobile devices?
Yes. The Timeline widget includes responsive controls to ensure your timeline looks great on all devices including tablets and smartphones.
How many posts can I show in the timeline?
You can display as many posts as you want. The widget lets you control post count, order, and other settings.
Can I use the timeline to display events instead of blog posts?
Yes. You can easily display them in a timeline format by using the Custom source.
Can I change the timeline layout?
Yes, you can switch skins and adjust alignment and style for different visual effects.
Final Thoughts
And that’s it! With just a few simple steps, you’ve transformed your regular blog layout into an interactive and visually appealing timeline.
Ready to boost engagement and improve content flow? Try the Timeline widget and give your readers a reason to keep scrolling!


