

The ACF Flexible content field is one of the most important features of Advanced Custom Fields. It let you have a simple, structured block-based editor with multiple layouts and sub-fields that provide complete control over page structure. However, this flexibility can even be more problematic: if you wish to display these flexible content blocks on the front. As you will need to write tons of PHP code for each layout or manually coding HTML & CSS, every time users want it differently than before?
But what if I tell you that you could achieve this with our plugin “Anywhere Elementor Pro” and your favourite page builder Elementor without writing a single line of code and losing any of the flexibility.
In this tutorial we’ll follow a simple & systematic approach towards displaying data from ACF Flexible Content on your Elementor page builder.
Table of Contents
To give you a better understanding of ACF flexible content usage, I have divided this tutorial into 3 sections.
1. Understanding ACF Flexible Content Fields
To display flexible content on the Elementor front-end, first, we need to create flexible figures for our setup. Then, with the ACF plugin installed, go to ACF -> Field Groups -> Add New Field.
- Start by giving the field group a name and assign to a post or a page.

- Click on the Add Field button, then give this field a label and select Flexible Content under the Field Type option. This will allow us to set up flexible content groups.

- Next, we have to create layouts for our flexible content group.
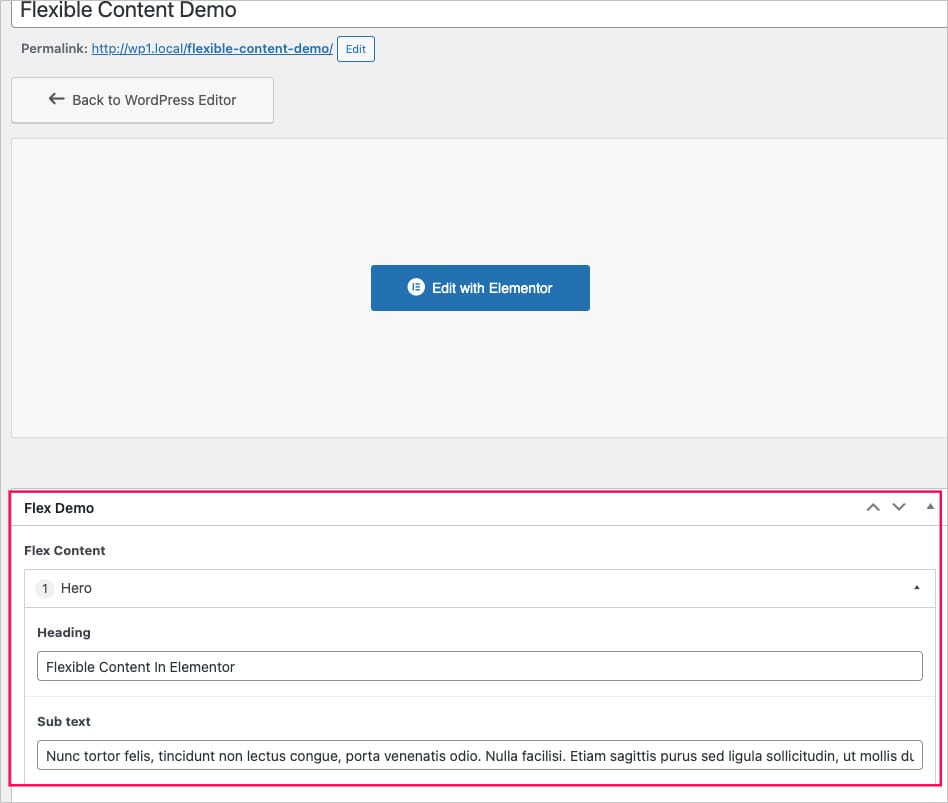
In this tutorial, I have created three layout groups – Hero, Section, and a Gallery. For example, I labeled my first layout as “Hero” and then added two flexible content fields: Heading and sub-text fields inside the group.

Similarly, I have created two more layout groups – A Section and a Gallery.
Note: For Image field type, set Return Format to “Post ID” and for Gallery field Type set return format as “Image Array”.

By now, we have completed our ACF Flexible Content Field set up; next; you need to populate these fields onto a page or post just like we do for the rest of our Custom Fields.
2. Designing a Template for each Flexible Content Layout
After setting up the flexible fields, our next step is to design the templates for each layout created under the Flexible Content group.
For creating the templates, I will be using AnyWhere Elementor Pro.
Start by creating a new template under the AE – Templates. As you know, I had added three flexible content layouts above, so I’ll need three separate template layouts designs for each flexible group.
Now let’s start designing the templates(say for the “Hero” flexible layout)
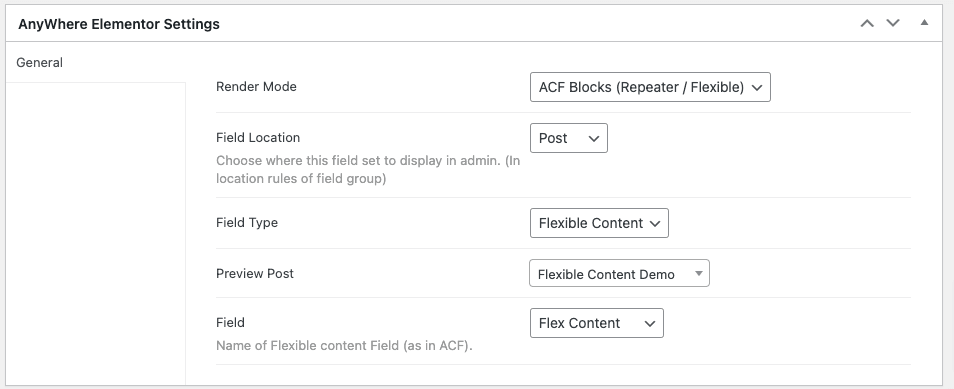
- Under the AnyWhere Elementor settings, you need to perform the following configurations.
- Render Mode: Select ACF Blocks option when designing the layout for Repeater field or Flexible field
- Field Location: Select Post as location.
- Field Type: Select the Flexible Content option.
- Preview Post: Here you need to select the posts on which you have applied the flexible content fields.
- Field: Select the field name.
2. After doing the configurations, edit the template in Elementor editor.
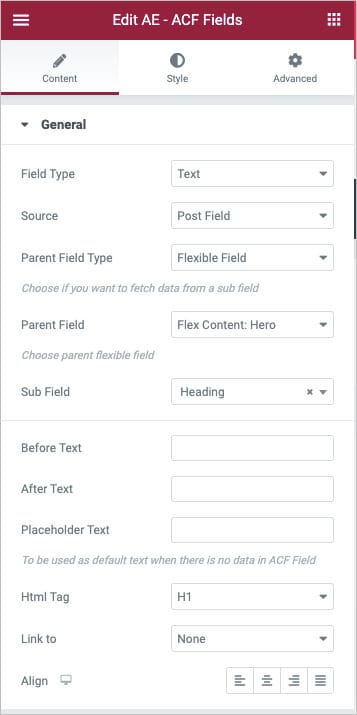
3. Under the Elementor editor, use AE – ACF Fields widget or add any other Elementor widget for dynamic content.

Likewise, we need to create two more templates for the Section and Gallery field groups.
3. Displaying ACF Flexible Content In Elementor
Here, we will be displaying content from the flexible fields on the frontend in the final step.
Now we will be using the above-created templates to display the flexible field content on the page.
- Edit the page in Elementor Editor, where you entered the custom field meta details and drag and drop the AE – Flexible Content widget onto a section.
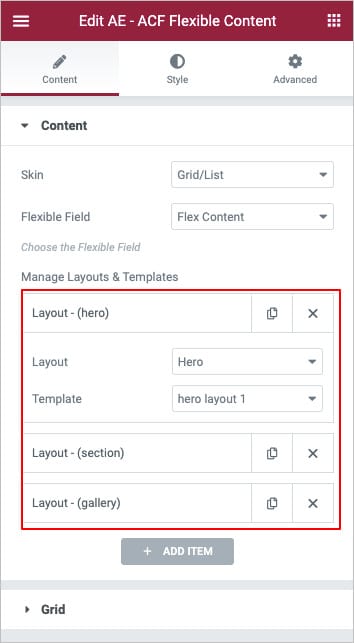
- Next, we need to configure the widget settings. Choose Skin as Grid or Carousel and then select the ACF Flexible Content Fields name.
- Under the Manage Layouts & Templates option, we can add the layouts that we have designed earlier for each flexible field group. Remember the layouts will be rendered in the same order as created under the flexible content field you cannot reorder them.
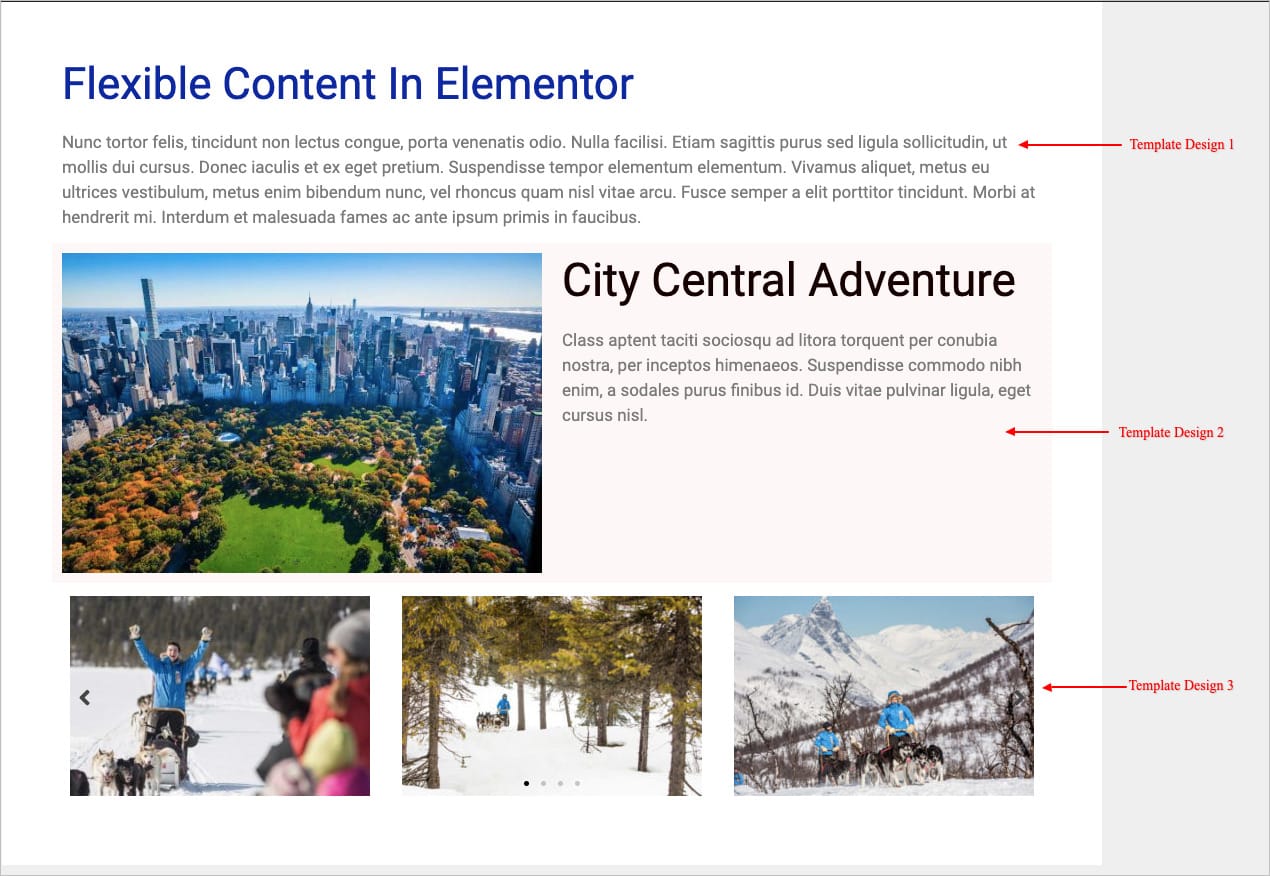
That is it, want’s that simple, all the content from the ACF Flexible field group has been rendered in three different layout styles on a single page.
Conclusion
As you have seen in this tutorial, how easy it is to add ACF flexible content in Elementor. Design different templates for your flexible layouts based on your imagination. You can create as many layouts as you want without much effort. To know more about the what is ACF Flexible Content Field Type!? You can Check out the below article :


